Creating vector doodles by drawing on paper
By Matt Visiwig  Jul 11, 2023
This tutorial is part of a three part series where I demonstrate ways to create vector doodles. You’ll likely want to use this method if you want highly organic and textured doodles.
Drawing on paper is a versatile approach. It’s great for beginners because they likely have the drawing tools on hand. It’s also used by professionals, because it’s hard to replicate the nuances that pencils, pens, and markers create digitally.
Step 1: choose your paper
If you’re after textured strokes with a grunge aesthetic, you’ll want to opt for a textured paper. This allows markers and the like to apply rough and noisy edges to your strokes. If you want smoother strokes, you’ll potentially want smooth paper, just note that if you reach for something glossy, you may have trouble with the photographing step.
The other important factor is that you’ll want high contrast with the maker, so in general bright white paper is ideal.
Step 2: choose your drawing utensil
You can get a wide range of characteristics from a slew of drawing utensils that you might have at your disposal. My main note here is to experiment with your strokes early, maybe by sampling a bunch of your options. Go through all the steps to digitize the samples so you’ll have a better understanding of what pen or marker you prefer.
In most cases where you chose bright white paper, make sure your ink, paint, or lead creates dark enough strokes. Good contrast helps the photo and vectorizing stages.
Step 3: draw doodles
In step 2 I recommended you draw sample strokes from various drawing utensils and here I also recommend sampling strokes. You can try drawing thin and fast strokes, to heavy and slow intentional strokes. You can hold your pens at angles, press soft or hard, draw fast or slow strokes, and even draw multiple strokes over the same doodle.
Once you settle on what is working best, then it’s time to fill out a page or five.
Step 4: photograph or scan your drawings
Next, most of you can reach for your phone camera, which is sufficient to get the job done. You shouldn’t have much trouble getting good photos, just make sure you have decent lighting to achieve good contrast between the paper and doodles. The closer you can photograph the strokes, the better the quality you’ll be able to capture texture.
If you have trouble or get poor results with the last step, vectorizing your photo, it may be help to go back and take up close photos that focus on only a few doodles. Otherwise pixelated doodles will likely create very choppy results.
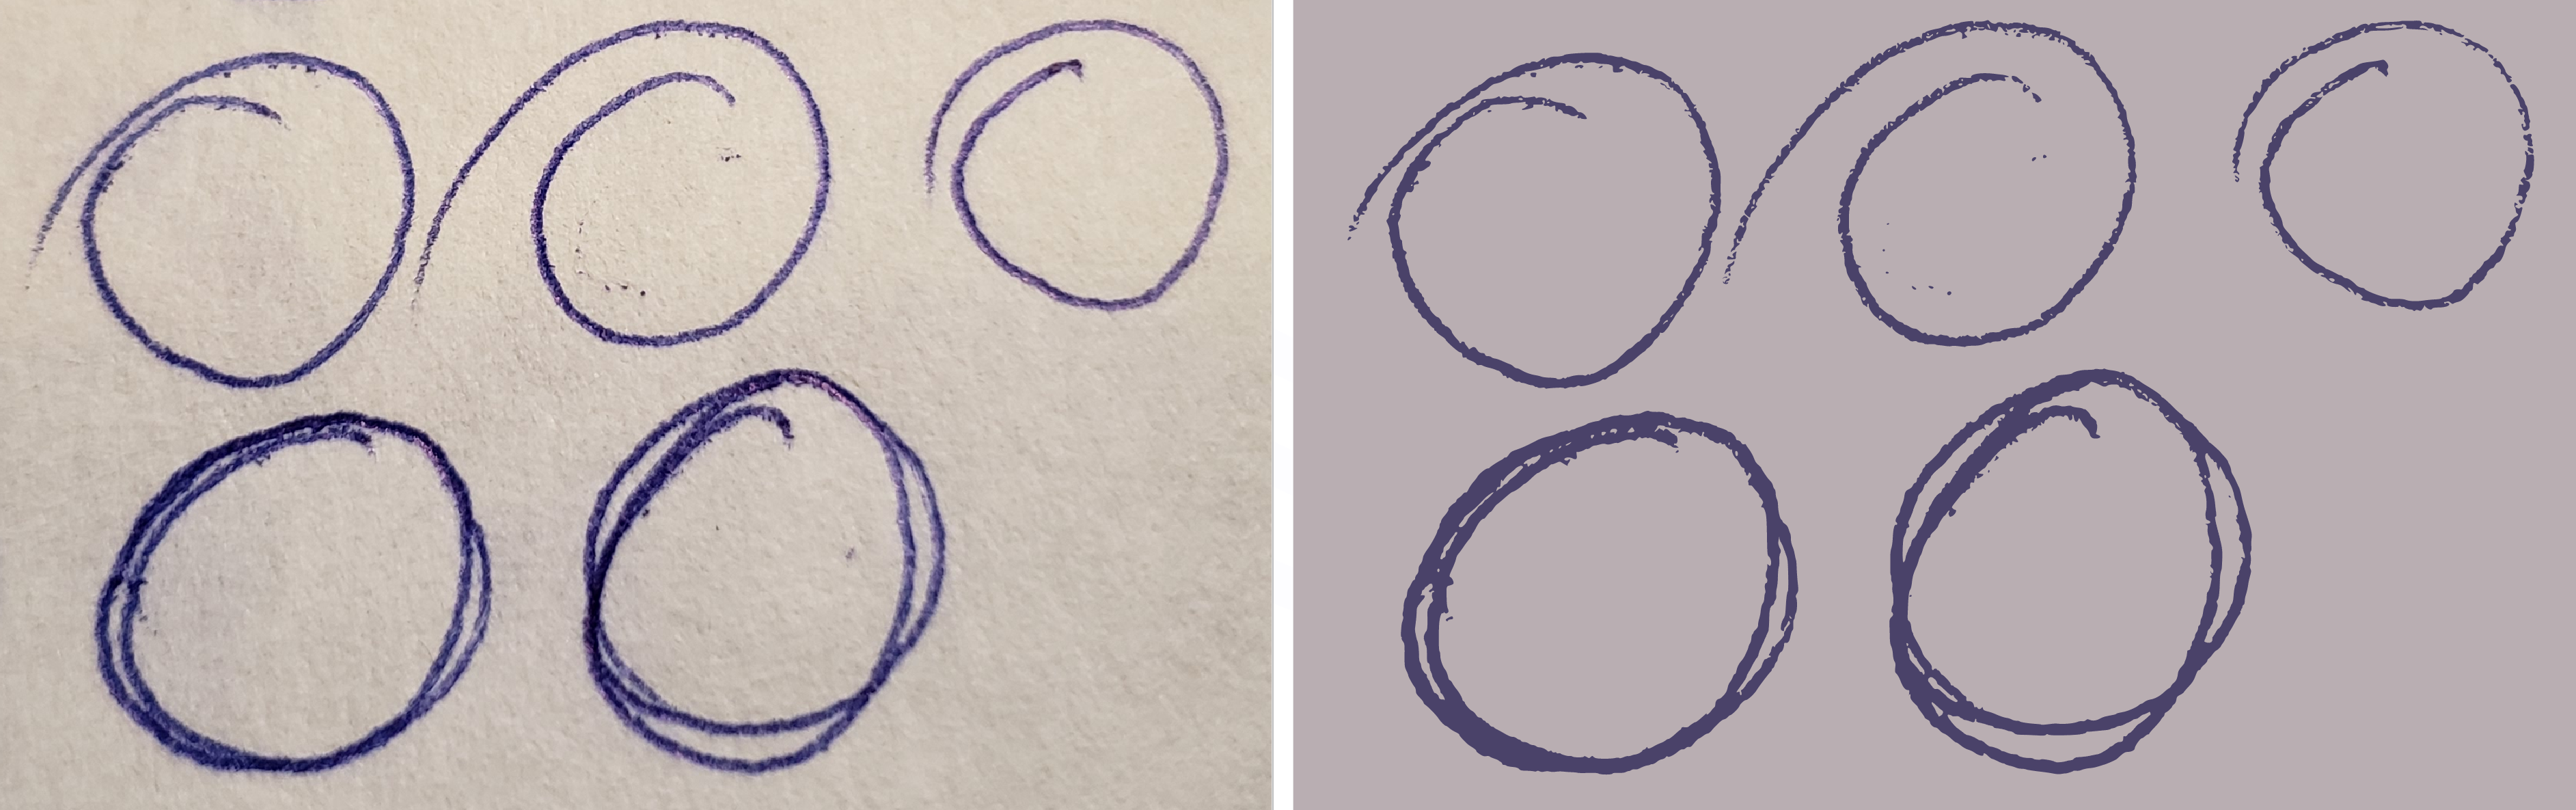
Step 5: vectorize the photo
Vectorizing photos probably deserves it’s own post, so I’m going briefly share options to vectorize your doodle photo.
The great news is there are multiple free ways to vectorize an image, so let’s start with the websites where you simply upload, tweak a few options, and it spits out a vector. I like VectorMagic.com for the setting to use a palette of two colors and vectorizer.io for it’s preset drawing settings. Both have opinionated results, where you’ll either like the results or have to look for another tool.
Another free option is the open source vector software Inkscape. It has a trace bitmap feature, which allows for far better fine-tuning and after it’s converted to a vector object, you can simplify the results further with CTRL+L.
If you have access to Illustrator, I’d go that route and use it’s image trace feature over everything. It has the best control over the output, and like Inkscape, after you expand the output, you have plenty of tools to further simplify or clean up the doodles.
Step 6: cleaning up the vector doodles
If you don’t like the results of the vectorize process, you can manipulate the doodles further to reduce jaggedness, remove weird artifacts, and touchup the strokes size or stroke caps. However, even with that I find it important to do the heavy lifting in the previous steps, because cleanup can take a long time when there are lots of anchor points.
In Inkscape you can use CTRL+L to simplify the shape and Illustrator has a similar Object > Path > Simplify... option. I also use the smooth pencil tool to soften edges and reduce paths with a crazy amount of anchors and curves.
Step 7: save doodle as an SVG
In many cases, you may have your doodle in the vector software of your choice and know where to go from here. But I will add that saving the doodle as an SVG makes it quite versatile since it can be imported to any vector software and used on websites.
Step 7b: optmize the SVG
If this svg doodle will end up on a website, you’ll likely want to reduce the file size. I do so by simply running the SVG code through SVG OMG.
Drawing Conclusions from Our Vector Doodle Process
As we wrap up this first part of our series on creating vector doodles, let’s reiterate a fundamental concept: experimentation is key.
The early stages of this process — selecting your paper, choosing your drawing utensils, and sketching your initial doodles — are a playground of possibilities. They offer you a chance to play with different textures, experiment with a variety of strokes, and explore how different pens or markers interact with varying types of paper. The results of these early steps directly impact the final look of your doodles.
The process of vectorizing your doodles can be challenging to get right, but once your find the right software and settings, it can become quite efficient to turn pen strokes into vector art and reduce the need adjust individual anchor points.
Remember, it’s all about finding what works best for you. The beginning might involve a lot of trial and error, but that’s where the magic happens. That’s where you get to discover your unique doodling style.
On the flip side, just because you can use pen and paper, doesn’t mean you should. Especially if you’re after cleaner strokes and less texture, I would look at one of the other methods to creating doodles. Best of all, the other methods are drawing digitally, so there is fewer steps overall.
Hey, I'm Matt , the creator behind SVG Backgrounds. I produce free and paid resources every month, sign up for alerts.